Getting Started with Load Balancing (HAProxy)
Load balancing distributes incoming traffic across multiple servers or virtual machines. Distributing requests evenly across multiple machines improves responsiveness, and availability for an application. On our cloud platform we provide a simple load balancer template (named Load Balancer) that comes with HAProxy, a popular open source load balancer software, already installed, and ready to configure. A basic configuration is included, but if you want to learn more about HAProxy, and how to configure it, the documentation for the version in our template can be found here.
Requirements
A minimum of 3 virtual machines are necessary to setup a load balanced application.
- 1 Load Balancer virtual machine.
- 2 virtual machines with the application we wish to load balance (referred to as nodes).
HAProxy can handle a lot more, but this is the minimum you need.
Deploying the Load Balancer
Start by deploying a VM in your cloud account.
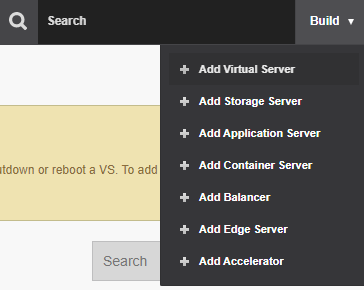
- While logged in to our cloud platform, click Build in the upper right-hand corner, and then select Add Virtual Server from the drop-down menu.
- Choose the desired location to deploy the virtual machine and then click Next in the bottom right-hand corner of the page.
On the Templates page, select the Application VMs group, and then select the Load Balancer image. Click Next.
This VM template is close to a base CentOS 8 image with minor configuration changes, and a recent, stable LTS version of HAProxy already installed.
- Give the virtual machine a label, hostname, and password. Click Next when you are finished.
- Configure the desired resources for the load balancer. The amount of RAM and number of CPUs the virtual machine will need is going to depend on the amount of traffic your application receives. You can use the values selected automatically or make your best guess; you can always change these values later if needed.
- The disks you can leave at their default sizes unless you plan to add additional software to this machine and you know you will need it.
- Increase the Port Speed to 1000 Mbps (increasing this resource has no additional cost, and will improve performance).
- Click Next once the settings are configured the way you'd like.
- Review the settings of the virtual machine here, and click Create Virtual Server in the bottom right-hand of the page if everything looks correct to create your load balancer virtual machine.
Basic Configuration
Now you will need to configure HAProxy appropriately.
In this example, HAProxy is going to be configured to balance requests between two nodes with a basic website.
- Node 1 - 198.49.75.201
- Node 2 - 198.49.75.249
- Establish an SSH connection to the load balancer virtual machine.
- If you don't have an SSH client on your machine or haven't used one before, you can connect to the virtual machine using the cloud panel. Open the load balancer virtual machine in the cloud panel, Dashboard > Virtual Servers > Name of your load balancer. Click Console, and authenticate using
rootand the password you chose during setup. If you didn't choose a password, and let the system generate one for you, click password to view the auto-generated password.
- If you don't have an SSH client on your machine or haven't used one before, you can connect to the virtual machine using the cloud panel. Open the load balancer virtual machine in the cloud panel, Dashboard > Virtual Servers > Name of your load balancer. Click Console, and authenticate using
- The load balancer is going to be used for web connections so port 80 will need to be opened in the firewall.
Execute this command as root in the HAProxy VM:
firewall-cmd --zone=public --add-port=80/tcp --permanent
If you plan on installing an SSL and handling HTTPS connections, open port 443 as well.
firewall-cmd --zone=public --add-port=443/tcp --permanent
Open port 8181 so you can access the stats page, too.
firewall-cmd --zone=public --add-port=8181/tcp --permanent
Now you need to reload the firewall to apply these new rules
firewall-cmd --reload
Open /etc/haproxy/haproxy.cfg in your preferred text editor and make configuration changes as needed.
Our provided configuration file is intended to make HAProxy suitable for most use cases, and contains comments explaining what most of the directives do. Here are a few things worth mentioning:
- HAProxy writes logs to /var/log/haproxy.
- Information level entries are written to the access.log file.
- Notices and all other non-emergency level entries are written to the status.log file.
- Emergency level entries are written to the error.log file.
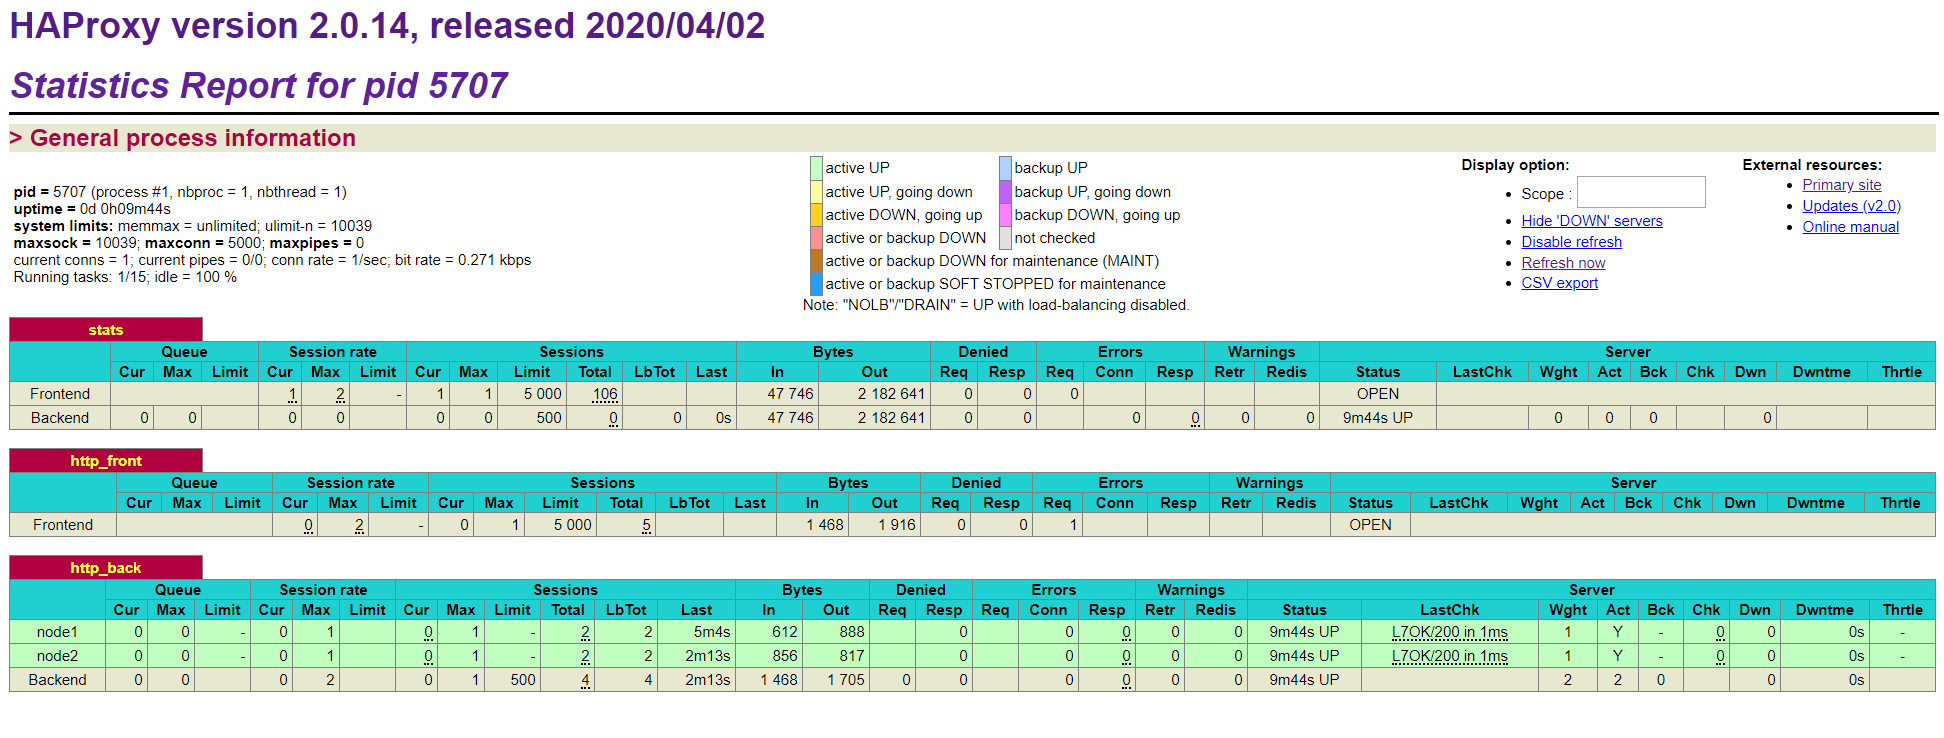
- The stats page can be viewed at <hostname or IP address>:8181 and require a username and password. The username and password are stored in the configuration file, and password is in plaintext so it's strongly recommended to use a unique password.
- Connections will timeout after 30 seconds without receiving a response.
- Connections are routed to nodes using a round robin algorithm: connections will be sent to each node in turn. More information about that algorithm, and others HAProxy supports can be found in HAProxy's documentation.
In the listen stats block, un-comment the stats auth line by removing the initial #, and replace <username> and <password> with the username and password respectively that you want to use to view the stats page.
The password is stored in plaintext in this configuration file. It is strongly recommended to use a unique password.
- In the
listen http_backblock, modify theserverlines (the lines at the bottom of the file), and add lines that point to your nodes. Each
serverdirective represents a different node in the load balanced cluster. Its syntax is:server <name> <address>[:[port]] [param*]
- <name> is an internal name that shows up in logs and alerts, and can be whatever you want as long as it is different from the other nodes.
- <address> is an IPv4 or IPv6 that goes to the node. Technically, this can also be a resolvable hostname, but the hostname is only resolved once when HAProxy starts, and doesn't offer any value over just using an IP address.
- <port> is the port the connection will be sent to on the node. If omitted, HAProxy will use the same port the client used to connect to it. We recommend explicitly setting the port to avoid unforeseen issues for now unless you have a reason to not set it.
- <param*> is zero or more parameters for the server. There are a number of parameters available for server, but for these specific example only the check parameter is used. See HAProxy's documentation for the full list of parameters, and their descriptions.
- The nodes were given the names
node1andnode2, the address is their respective IPv4 addresses, the connection will be sent over port 80, and thecheckparameter was used. Thecheckparameter tells HAProxy to perform a health check on the node before forwarding traffic to it. This means traffic will only ever be sent to online nodes.The lineoption httpchk HEAD / HTTP/1.1\r\nHost:localhosttells HAProxy to perform the health check by establishing an HTTP connection, and ensuring the returned status code is 2xx or 3xx. There a number of different health checks, and ways to customize them so consult the official documentation for more information if you're interested.
- HAProxy writes logs to /var/log/haproxy.
- Save changes to the config file.
Restart the service.
systemctl restart haproxy.service
Once the service is up, you can check the status by executing the following command:
systemctl status haproxy.service
If all of the steps were followed then your load balancer should be successfully balancing traffic between two nodes. If you don't have a domain name pointed to your load balancer yet, you can use its IP address for now to verify that it is working correctly.
Visit the stats page (<hostname or IP>:8181) to verify it is accessible, and that the credentials you put in the configuration file works.
SSL Termination at the Load Balancer
Terminating SSL connections at the load balancer is common configuration recommendation with HAProxy. In short, connections are encrypted until they reach the load balancer, and are then sent to a node unencrypted. SSL certificates are stored on the load balancer, and offloads encryption handling allow nodes to be more responsive. For this configuration to be truly secure, the traffic between the load balancer and its nodes need to be on a private network.
Unfortunately, it is not possible to have a truly private network between virtual machines on our cloud platform at this time.
We strongly recommend against using SSL termination at the load balancer.


