Install and Configure the Veeam Agent for Windows
The information below can be used to install and configure the Veeam Agent for Windows.
Install the Management Agent
In order to deploy the HostDime Veeam backup agent to a Windows system, you first need to download and install the Veeam Management Agent onto the target system.
-
Login to the HostDime Veeam Service Provider Console at https://draas.hostdime.com (if you are using our service). The welcome e-mail you received will have the URL and credentials should you need to reference it.
-
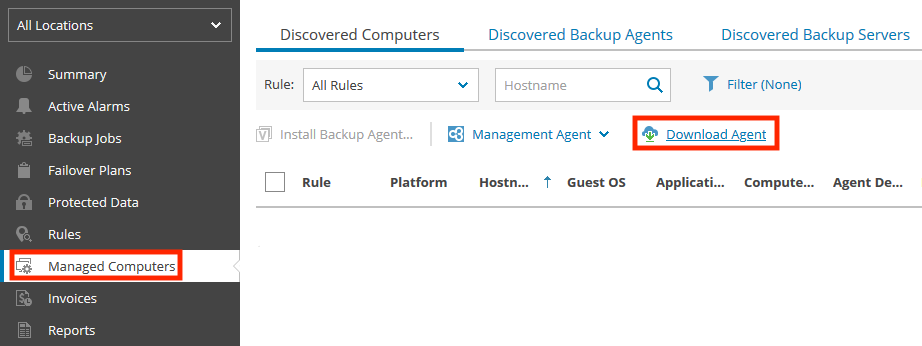
Once logged in, click the Managed Computers tab on the left hand side and ensure you are on the Discovered Computers tab. Press the Download Agent hyperlink to download the agent.
-
Transfer the agent installer to the system you intend to take backups of and run the installer. Complete the installation process once started.
-
Once the installation has completed, run the Veeam Management Agent. Using the welcome e-mail as a reference, fill out your login credentials and the gateway server.
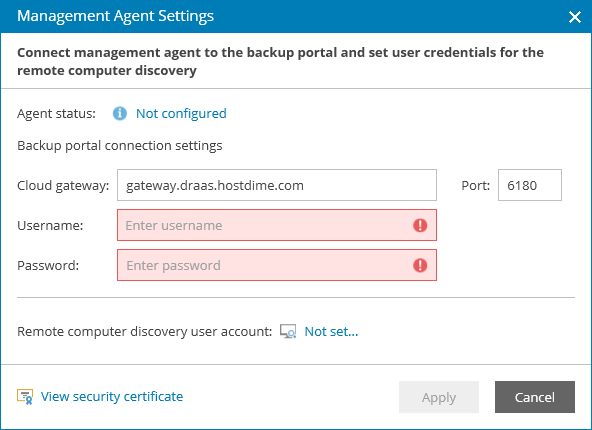
-
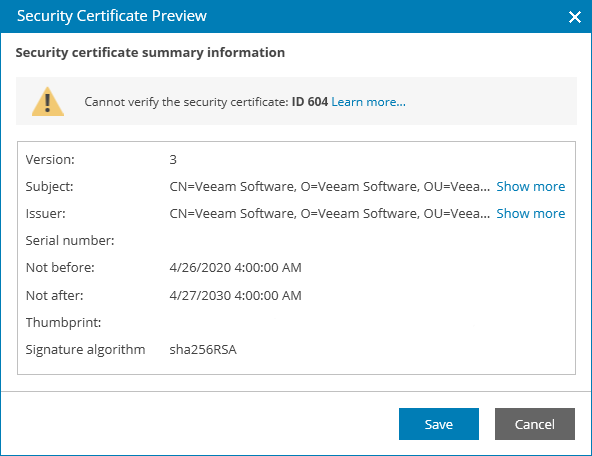
Press Apply and press Save if prompted with a Security Certificate Preview window. Once done, you will be prompted to restart the management agent which can be done by pressing Restart.
-
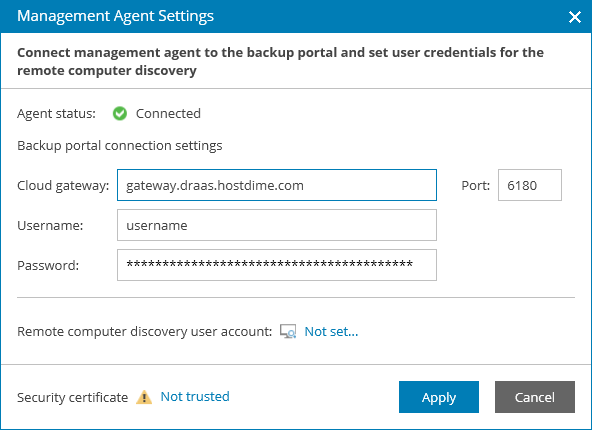
Once the management agent restarts, you should be able to see that the Agent status is now Connected. With the management agent installed you may now proceed onward to install the Backup Agent.
Install the Backup Agent
Now that the management agent has been installed, the Veeam Backup Agent can be installed onto the target system.
-
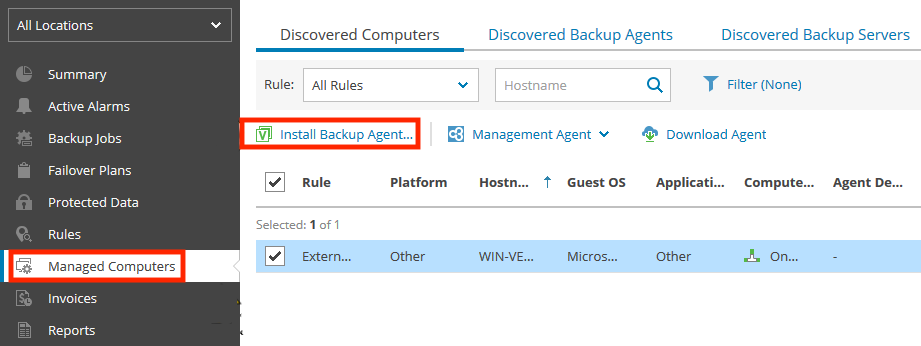
Access the Veeam Service Provider Console and access the Managed Computers tab again. The system where the Management Agent was installed to should now be populated under Discovered Computers. Select the target system and press Install Backup Agent... to begin the deployment process.
-
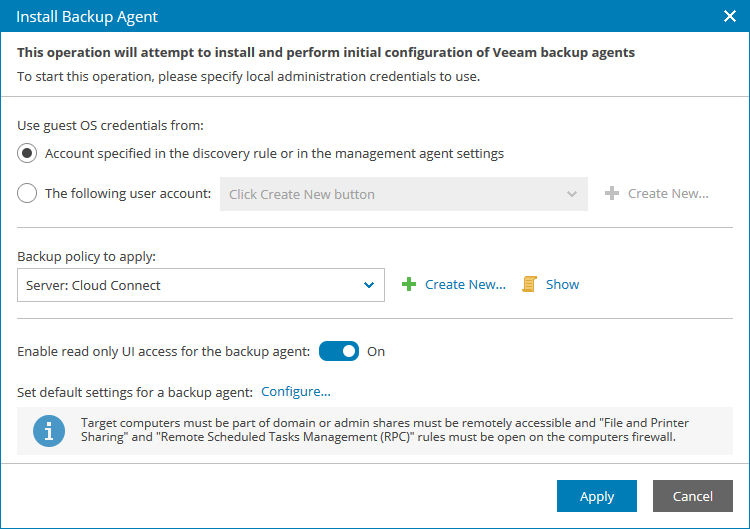
A new prompt will appear where various aspects of the backup agent deployment can be configured. If you have a specific backup policy for this server, it can be configured at this step or you can create a new backup policy by following the directions in Configure a Veeam Backup Job. You can modify the backup jobs that run on an agent at a later date if needed.
-
Once Apply is pressed, the deployment process will begin. The progress can be tracked by the Deployment Progress column and the final status can be determined by the Agent Deployment column.
If the deployment is returned as successful then you are now able to take backups of the target system.
Recovery Media
Although optional, we recommend creating a recovery ISO. In the event of your server failing to boot, the recovery image can be used to boot into a limited Linux system that can then be used to restore your data. The ISO can be created by running the Create Recovery Media application and completing the creation process. Once complete, you should download the created ISO and store it in a separate location that is not on the same server.