Restore a Veeam Backup on Windows
This guide will be covering how to restore files and volumes/filesystems on a system covered by the backup agent. This will be written assuming that you are saving backups to a Cloud Connect repository such as the one we provide, but the same general process can be followed to restore data from a network share or backup repository.
Restoring a Backup
Here's how to get started with a backup.
-
Access the system where data is being restored to and run the Veeam File Level Restore or Volume Restore application depending on what type of backup of you wish to restore.
-
On the step Backup Location, select Network storage and press Next.
-
On the step Remote Storage/Network Storage, select Veeam Cloud Connect repository and press Next.
-
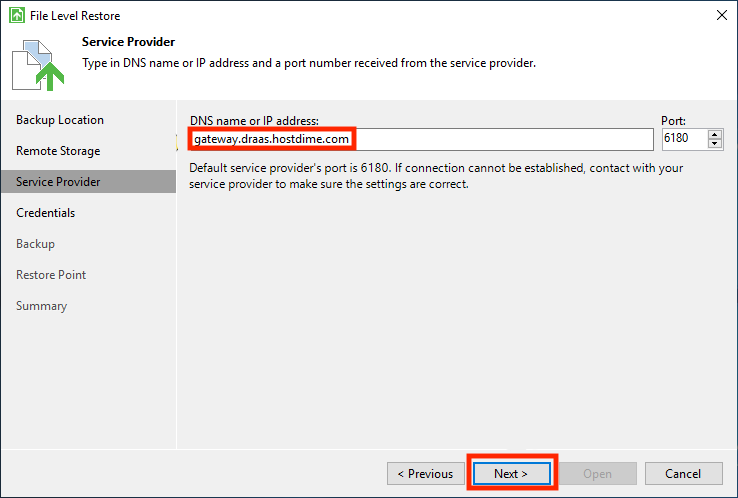
On the step Service Provider, input gateway.draas.hostdime.com (if you are using our service). The port should be left to the default of 6180. Then click Next.
-
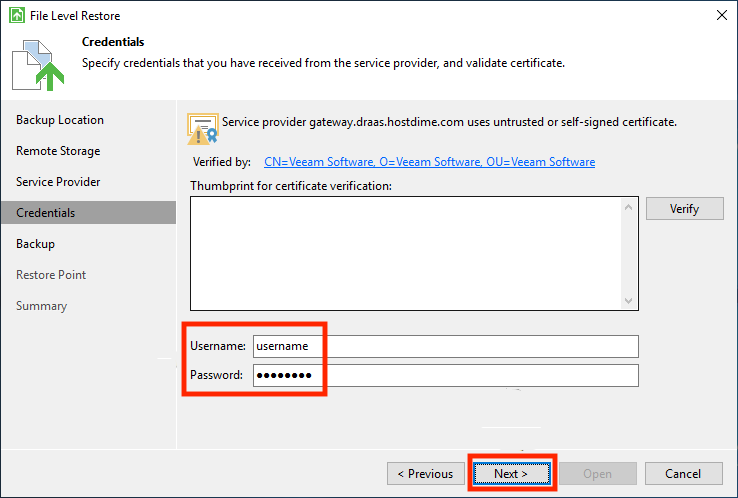
On the Credentials step, input the username and password used to login to the HostDIme Veeam Service Provider Console (https://draas.hostdime.com/). Do not input a company as part of the username. Click Next to continue.
-
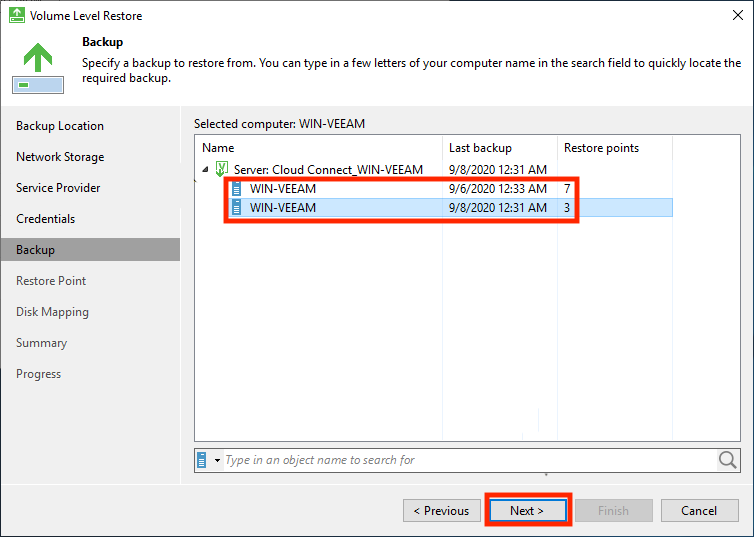
On the Backup step, select the backup that you wish to restore from. Keep in mind that the backup can hold multiple restore points to restore data from, so you may need to check several backups for the data you are looking for depending on the date of the backup. Click Next when done.
-
The restoration process diverges at this point depending on whether or not you are restoring files or a volume/filesystem. Skip to the appropriate section below.
Restoring Files
This section will continue to cover how to restore files using Veeam. This assumes that you have completed steps 1-6 above.
-
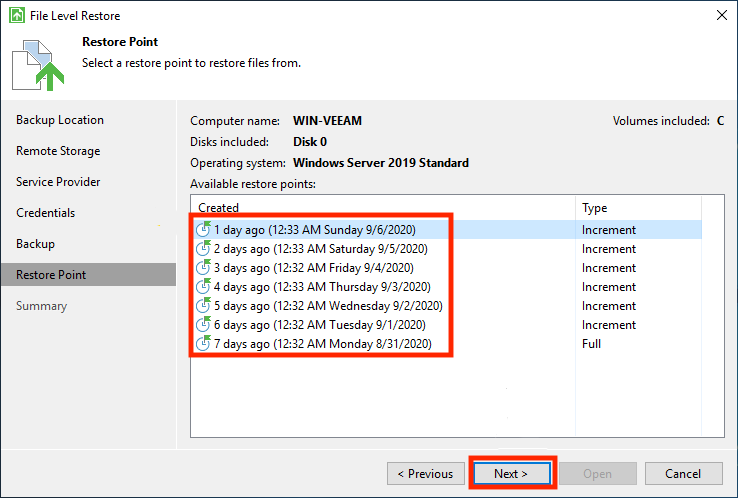
On the the Restore Point step, select the restore point that matches the data you are looking for. If the backup you've selected doesn't have the data you want, you can go back to this step later by pressing Previous and selecting another backup.
-
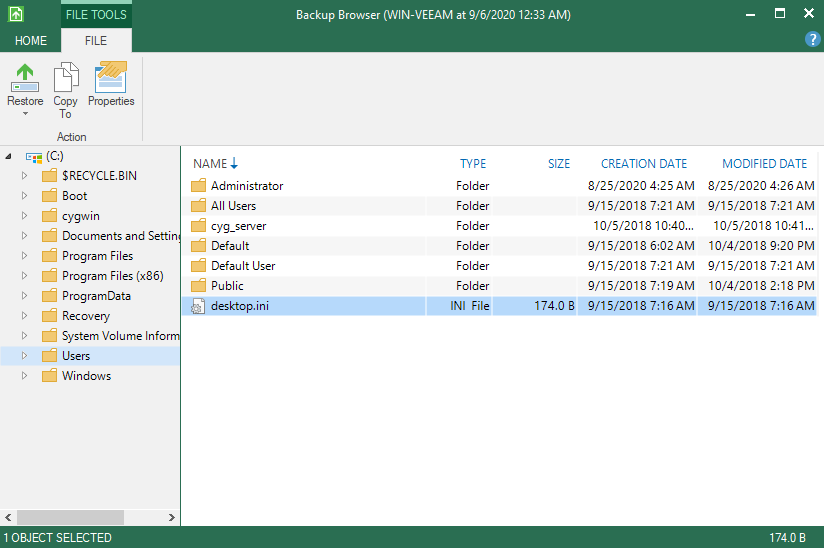
The Summary step will show you the name of the device you are restoring as well as the restore point you have selected. Press Open to proceed with opening the Backup Browser which can be used to selectively restore data from the given restore point.
Restoring Volumes
ℹ️ You cannot restore a volume where the OS resides on a live system.
This section will continue to cover how to restore a volume/filesystem using Veeam. This assumes that you have completed steps 1-6 of Restoring a Backup (above) already.
-
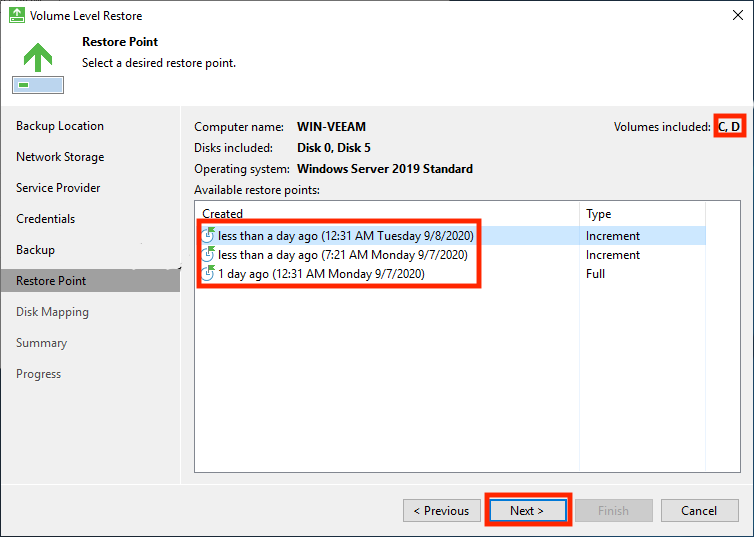
On the the Restore Point step, select the restore point that matches the data you are looking for. Take care to note the Volumes Included text on the top-right as that indicates the available volumes to restore from within the selected restore point. If the backup you've selected doesn't have the data you want, you can go back to this step later by pressing Previous and selecting another backup.
-
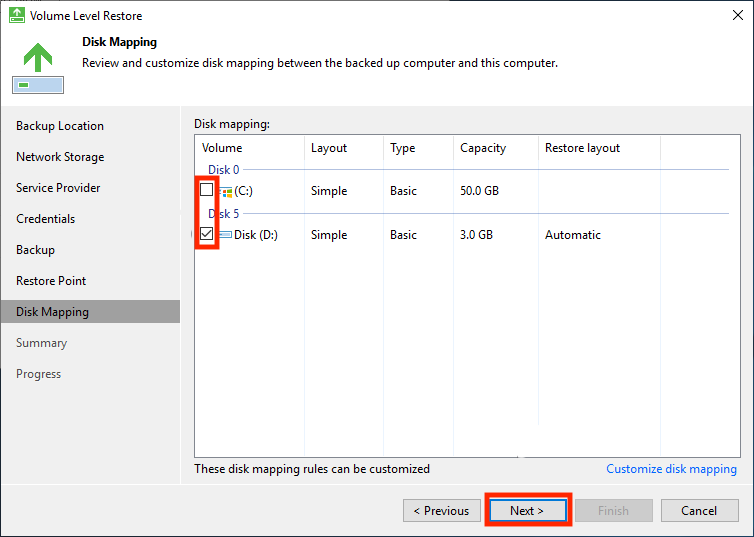
On the Disk Mapping step, select the volume you wish to restore and press Next once ready. Once Next is pressed, Veeam may display a confirmation prompt concerning the mapping of the volume where the restoration is taking place. Unless configured otherwise, Veeam will attempt to automatically map the selected volume to a disk partition on the system.
-
The Summary step should be reviewed to ensure that the restoration you are performing is accurate. Once you are ready to begin the restoration, press Restore and monitor the Progress step until completion.
⚠️ Take serious care to ensure you are not restoring a volume over existing data you intend to preserve.