Filter Inbound Mail for a Domain if not Scanned by HostDime's Email Filter Service
HostDime's inbound Email Filter service does a great job of removing spam and malware before it reaches your inbox, but spammers are crafty. Some spammers may choose to ignore the actual MX records set for your domain and instead try to deliver their poison directly to your local mail server. However, it is possible for you to fight back against this by setting up a filter to automatically delete email that hasn't been scanned by our service.
Click on the tab below that corresponds to the type of server you have to learn how to set this up.
⚠️ Important!
If you've just signed up for our anti-spam service, do not set up destructive filters for 4-12 hours after the MX record changes are made.
If you set up this filter to delete mail too soon, legitimate mail may be removed because legitimate mail senders have not yet noticed the change.
In addition, depending on your mail server setup and how you set up your mail filtering, it may also delete mail sent from the local server to your domain. You should adjust your filters as appropriate or not set this up at all if that is a concern.
cPanel
Here's how to set up a server-side filter to delete new mail that comes in that hasn't been scanned by our service. This won't affect existing mail in your account, only new messages that come in.
- Log into the cPanel account that has the domain that is using our anti-spam service.
- Select Global Email Filters (not the separate Email Filters
item) from the **Email **section.

- Click the Create a New Filter button.
- Filters created here affect all domains assigned to this cPanel
account, so the exact filter you set up will be different depending
on your situation:
- If you only have a single domain assigned to this cPanel account and you don't plan to have any others added in the future, go to step 5.
- If you have more than one domain assigned to this cPanel account and you don't have our anti-spam filter service activated for all domains, go to step 6.
- If you have more than one domain assigned to this cPanel account, but you have our inbound anti-spam service activated for all of those domains and plan to keep it that way, go to step 5.
- Fill out the Rules and Actions as follows if you have a
single domain or want the rule to apply to all domains in your
cPanel account

-
Enter a descriptive name in the Filter Name text field. This name will only be displayed in cPanel. Make sure the filter name doesn't match any other global filters you set up previously.
-
For the first Rule select Any Header from the first drop-down field
-
Select does not contain from the second drop-down field
-
Carefully type or paste in the following into the text field at the end of the rule:
X-Spampanel-Class -
Select and from the drop-down field to the right of the rule (next to the + and - buttons).
-
Click the + button on the right of this rule to add another rule.
-
For the next Rule select Has Not Been Previously Delivered.
-
Under the Actions section, select Discard Message.
✅ You could adjust the action to move the message to a special folder on the server or forward that message somewhere else if you want to check your mail filter before it starts removing mail.
-
Click Create to save this filter and have it apply immediately.
ℹ️ Here's an explanation of what you just did: You created a filter that searched all of the headers of inbound mail for a header than contains X-Spampanel-Class. If that header doesn't exist and the mail hasn't been delivered already, delete the message from the server. This works because every message scanned by our anti-spam service will contain this header. If it doesn't exist, the message was delivered directly to your local mail server and thus is spam.
-
The process is complete. Do not follow the other steps below.
-
- Fill out the Rules and Actions as follows if you have more
than one domain and don't want the filter to apply to all domains in
your cPanel account.

-
Enter a descriptive name in the Filter Name text field. This name will only be displayed in cPanel. Make sure the filter name doesn't match any other global filters you set up previously.
-
For the first Rule select Any Header from the first drop-down field.
-
Select does not contain from the second drop-down field.
-
Carefully type or paste in the following into the text field at the end of the rule:
X-Spampanel-Class -
Select and from the drop-down field to the right of the rule (next to the + and - buttons).
-
Click the + button on the right of this rule to add another rule.
-
For the next Rule select To from the first drop-down field.
-
Select contains from the next drop-down field.
-
In the text field at the end of this rule, carefully enter the domain name of the domain we're filtering through our anti-spam service.
-
Select and from the drop-down field to the right of the rule (next to the + and - buttons).
-
Click the + button on the right of this rule to add another rule.
-
For the final Rule select Has Not Been Previously Delivered.
-
Under the Actions section, select Discard Message.
✅ You could adjust the action to move the message to a special folder on the server or forward that message somewhere else if you want to check your mail filter before it starts removing mail.
-
Click Create to save this filter and have it apply immediately.
ℹ️ Here's an explanation of what you just did: You created a filter that searched all of the headers of inbound mail for a header than contains X-Spampanel-Class. If that header doesn't exist and the message doesn't contain your domain name in the To: line somewhere and the mail hasn't been delivered already, delete the message from the server. This works because every message scanned by our anti-spam service will contain this header. If it doesn't exist, the message was delivered directly to your local mail server and thus is spam. This will also mean that local messages sent from the server your domain is hosted on to your domain will be deleted. Don't use this if you want to receive local mail.
-
Plesk Linux
On Plesk Obsidian running on Linux, there is no way to set up a domain-wide server-side mail filter from the Plesk interface at this time. The only way to set up server-side filtering in Plesk Linux is to use Roundcube webmail and set up a filter for each email account separately. These directions won't affect existing mail in your account, only new mail that comes in after the filter is set up.
- Log into Roundcube webmail for one of the email accounts in your domain.
- Click on the Settings button on the top-right of the Roundcube
screen.

- Click on Filters in the Settings section (the first
column).

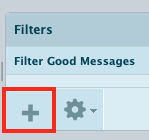
- Click the + button under the Filters column to create a new
filter.
- Now you need to fill out some specific information to set up the
server-side filter.

-
Give the filter a descriptive name in the Filter name field. This name will appear in the list of filters after you create it.
-
In the For incoming mail section, you can leave marching any of the following rules selected, as we only need to create one.
-
In the blue shaded area, select the first drop-down field and select the ellipsis (...).
-
In the first text field after the first drop-down box, carefully copy in the following:
X-Spampanel-Class -
In the final drop-down field select not exists.
-
In the execute the following actions section, select the drop-down field and select Delete message.
-
Click the Save button at the bottom once the filter is set up.
-
✅ The filter you create becomes active for new mail as soon as you save it.
Repeat these steps for every email account in the domain (or have the appropriate user do it).
Plesk Windows
Unfortunately, with the default free Mail Enable mail server on Plesk Windows, it is not possible to do server-side mail filtering of any kind. You may be able to set up a client-side mail filter in your personal email client, however.
- The filtered messages will have some headers that unfiltered
messages do not. Here are some headers you can look for:
- X-Spampanel-Class
- X-Spampanel-Evidence
- The Received: headers will contain antispamcloud.com
Other Servers
There are lots of mail platforms out there and we can provide specific directions for all of them, but here are some generalized directions that should help you set up server-side or local mail filters.
Check your MTA documentation and see if you can find a way to filter messages from a specific domain that don't contain a specific header.
All messages that have been examined by our service will contain one or both of the following custom headers:
X-Spampanel-Evidence X-Spampanel-Class
You can filter messages sent to the filtered domain that do not contain those headers.
If that sort of filtering isn't possible or isn't working the way you want, you could also check the Received: headers for antispamcloud.com. If that isn't contained somewhere in those headers, then the message wasn't filtered by our service.