Generate a Self-Signed SSL Certificate Using cPanel
- Overview
- cPanel
- WHM
- Conclusion
Overview
This article will explain how to create a self-signed SSL certificate for a domain of your choice using cPanel. Please note that a self-signed SSL certificate is not the same thing as a SSL certificate issued by a provider such as Let's Encrypt or through Comodo's partnership with cPanel (AutoSSL). These certificates are not considered reputable by web browsers and need to be manually trusted.
cPanel
This section will cover generating a self-signed SSL certificate as a cPanel user. You should follow this process if you are logged in to cPanel and not WHM as the root user.
To follow this process, you will need the feature SSL/TLS enabled for your cPanel account. If you purchased your cPanel account from a reseller, they will need to enable this feature for you. To verify if you have this feature enabled, you should be able to access cPanel » Security » SSL/TLS. An image of this feature can be found in the below process.
-
Login to your cPanel account. cPanel can be accessed under your host server via port 2082 for HTTP or 2083 for HTTPS (e.g.
http://domain.tld:2082orhttps://domain.tld:2083). -
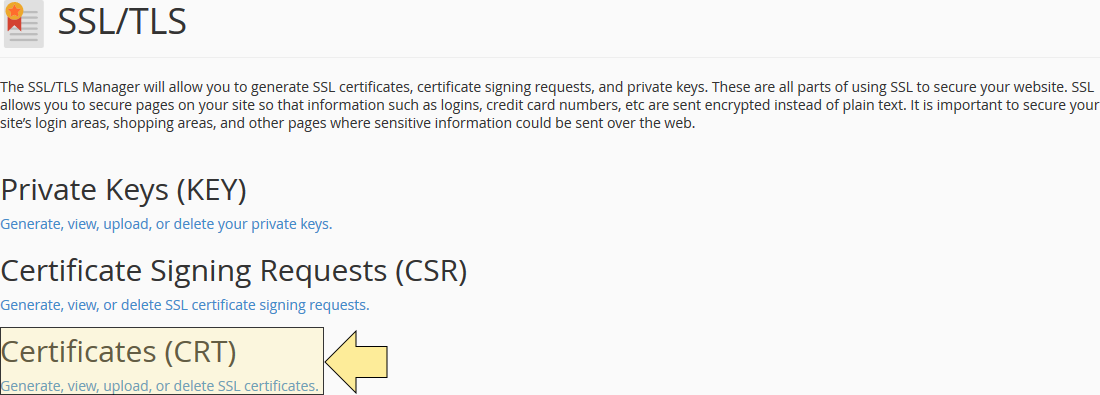
Under the Security section in cPanel, click the option SSL/TLS. The option is highlighted yellow below:
-
Once under the SSL/TLS page, click the hyperlink Generate, view, upload, or delete SSL certificates.
-
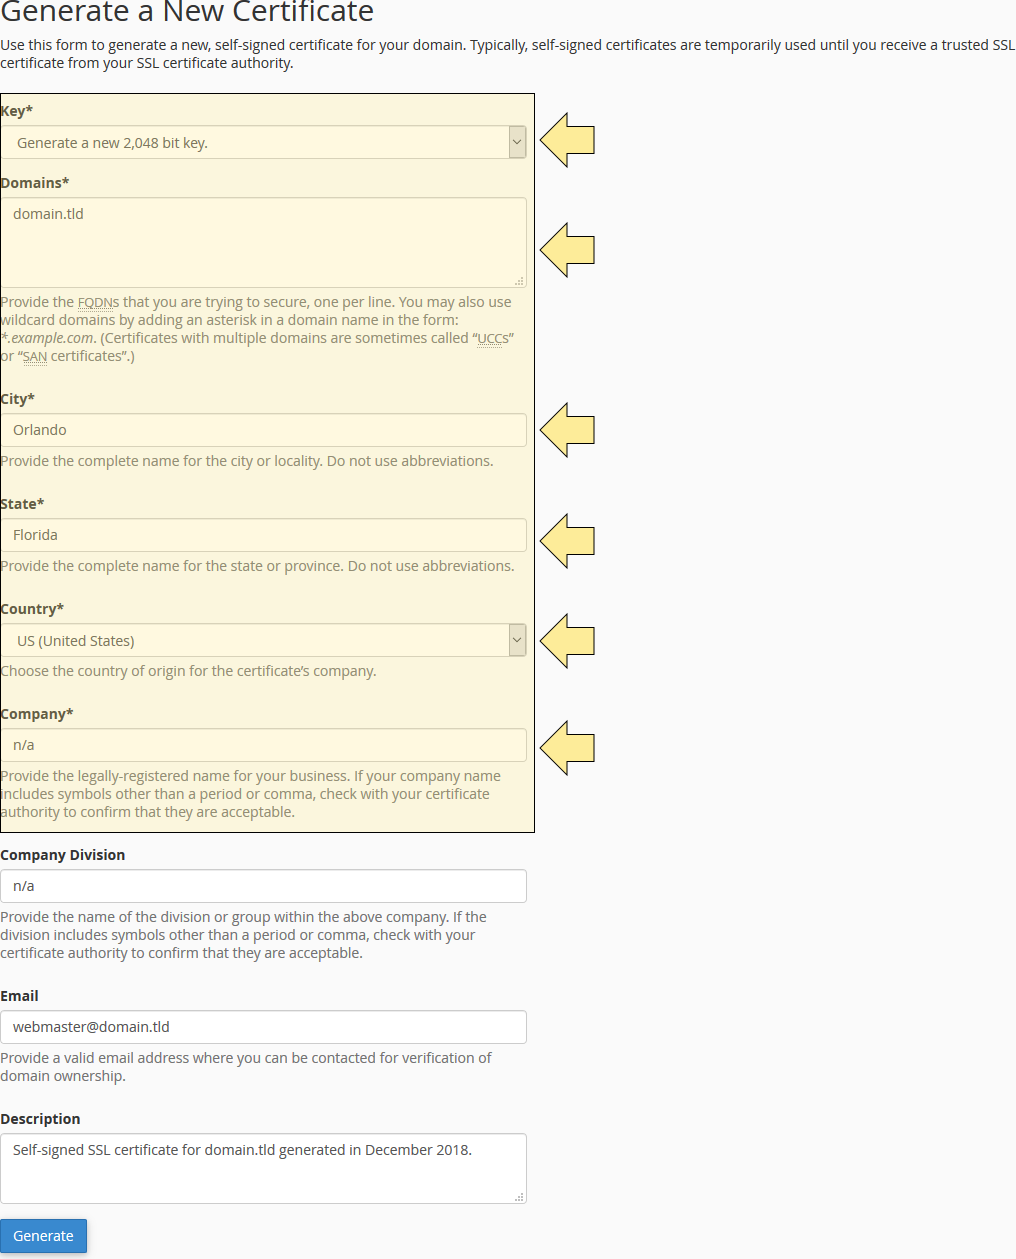
On the next page you should see various fields pertaining to your SSL certificate. Validated SSL certificates are typically issued with additional information that can be used to identify a domain's registrant. This information usually matches the WHOIS information for the domain you are creating an SSL certificate for.
In the below example, all of the fields that commonly apply to a CSR being submitted to a valid certificate authority have been filled out. The fields that are highlighted in yellow are required to be filled out in order for the SSL certificate to be successfully generated.
-
Once you have filled out the required fields, click the Generate button (
) at the bottom-left corner of the page to generate the self-signed SSL certificate.
-
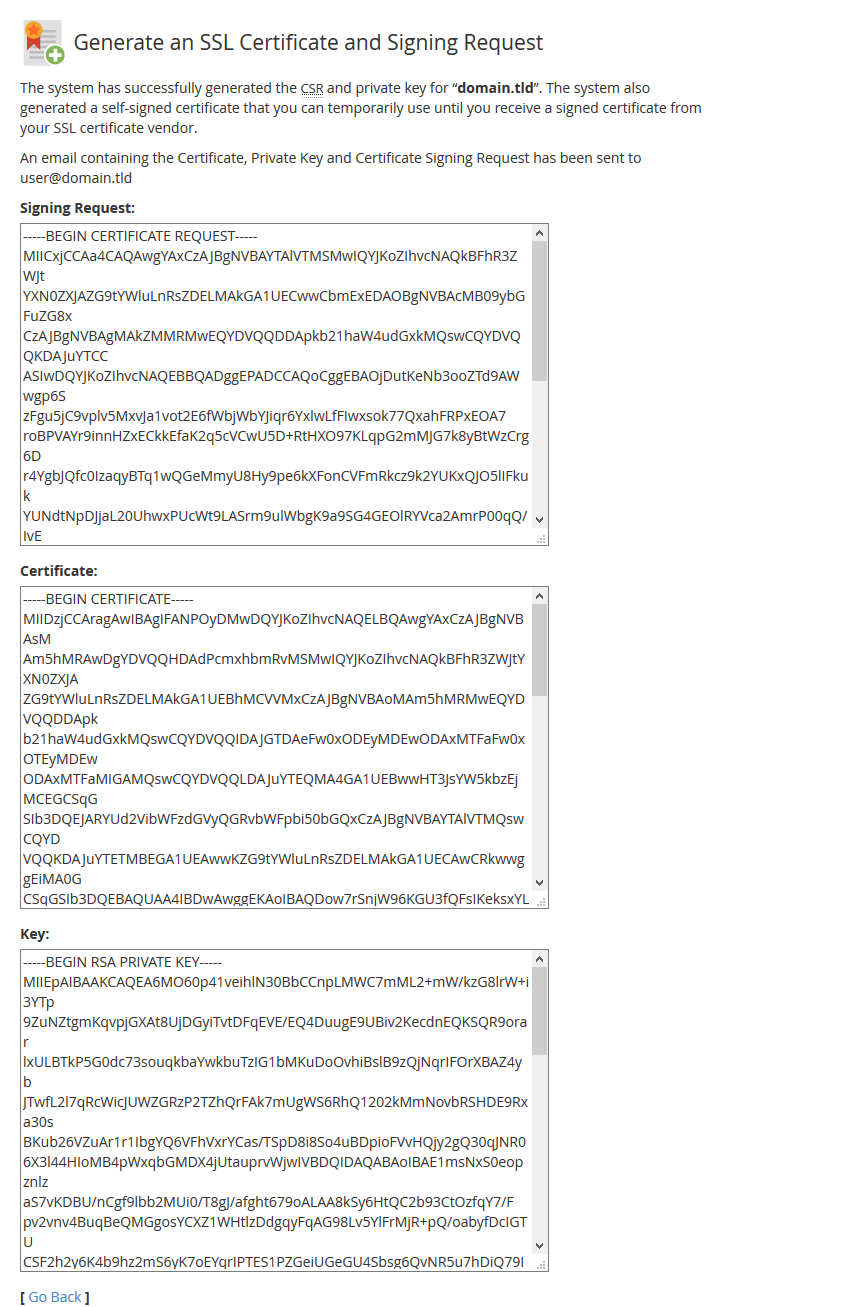
The next page will display the resulting self-signed SSL certificate based on your CSR. While cPanel automatically stores the SSL information that it generates (viewable in cPanel » Security » SSL/TLS » Generate, view, upload, or delete SSL certificates.), it is recommended to copy this information and save it to a local device for record keeping.

WHM
This section will cover generating a self-signed SSL certificate as the root user. You should follow this process if you are logged in to WHM only as the root user. If you only are a cPanel user or a cPanel reseller, you should follow the section above instead.
-
Login to WHM as the root user. WHM can be accessed under your host server via port 2086 for HTTP or 2087 for HTTPS (e.g.
http://domain.tld:2086orhttps://domain.tld:2087). -
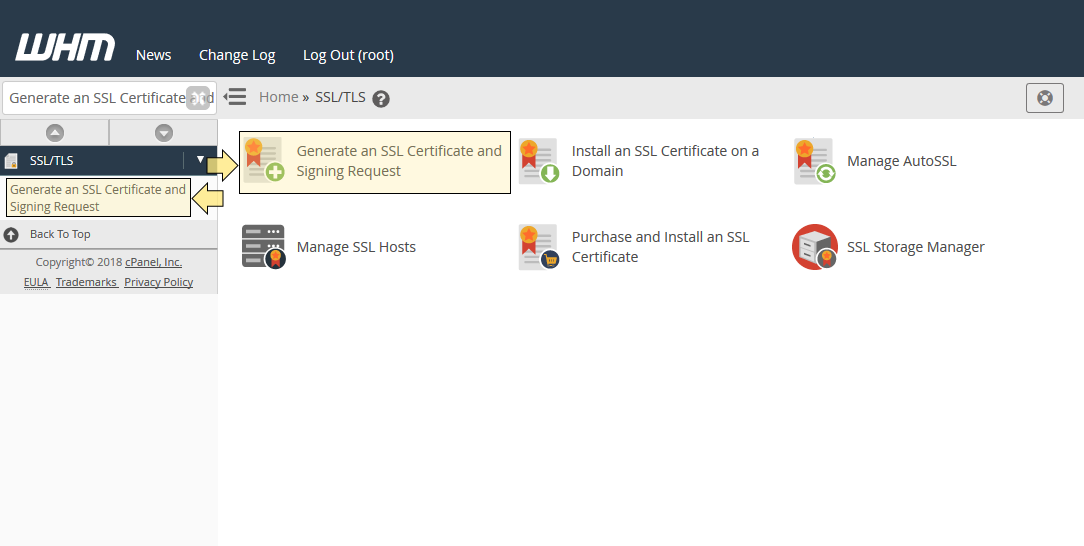
Under the SSL/TLS tab in WHM, click the option Generate an SSL Certificate and Signing Request. The options are highlighted yellow on both the side pane and the main panel below.
-
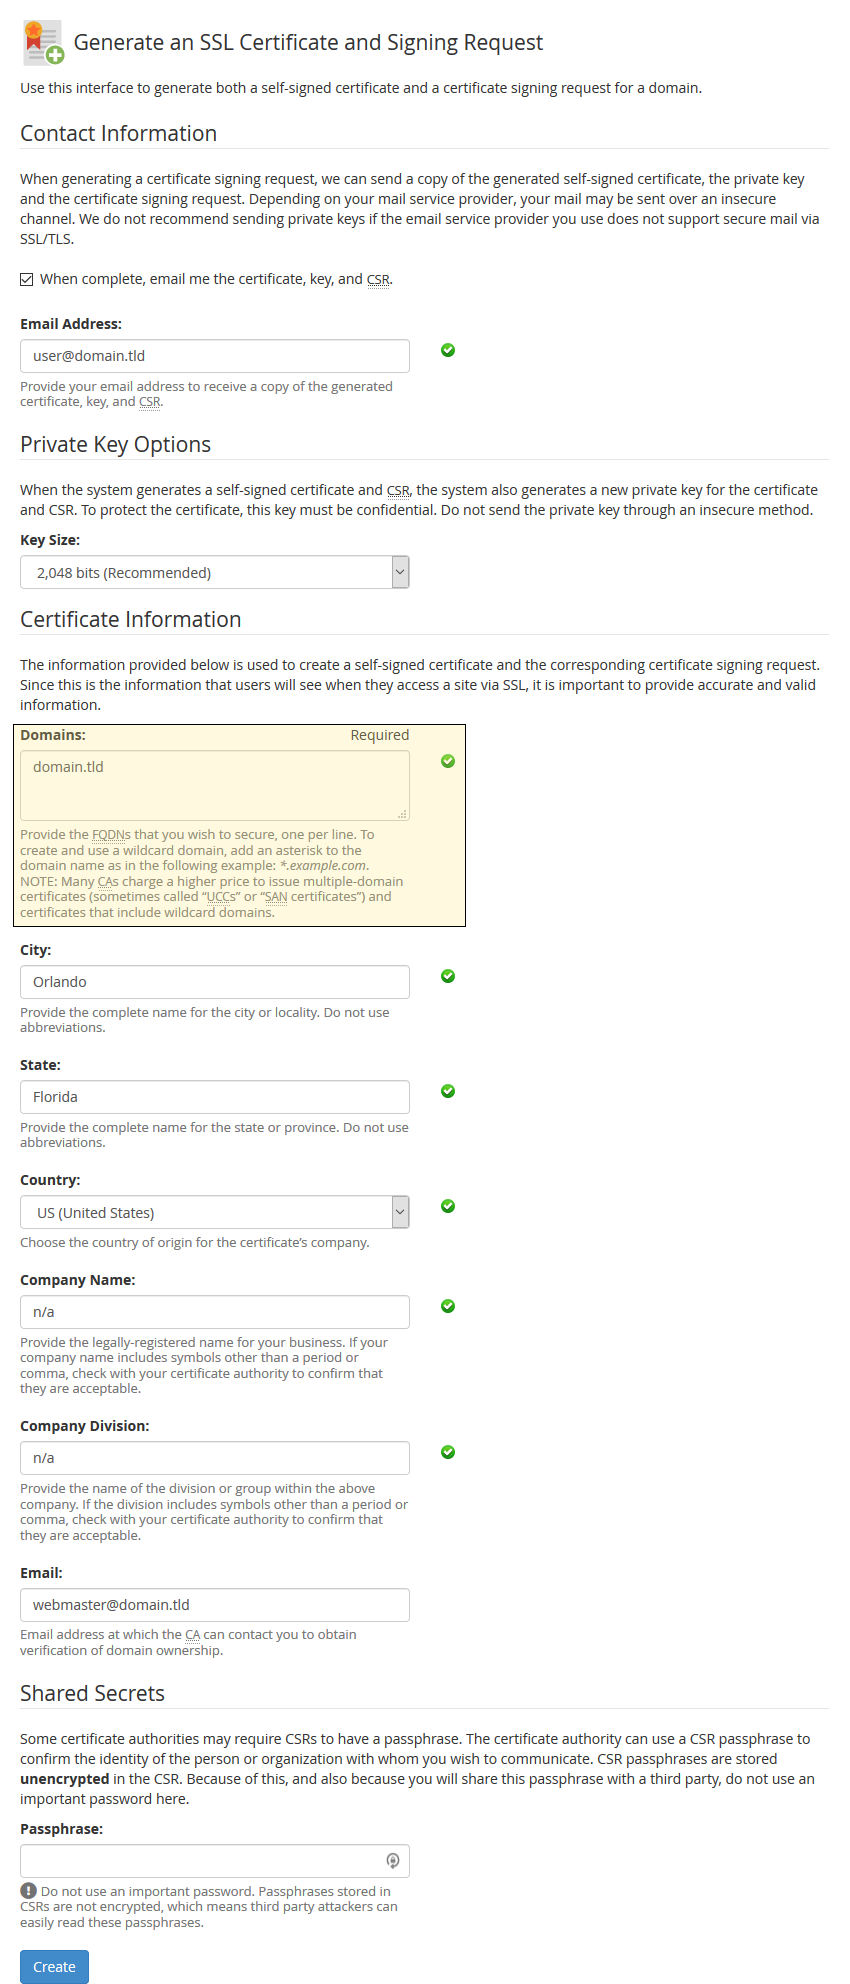
On the next page you should see various fields pertaining to your SSL certificate. Validated SSL certificates are typically issued with additional information that can be used to identify a domain's registrant. This information usually matches the WHOIS information for the domain you are creating an SSL certificate for.
In the below example, all of the fields that commonly apply to a CSR being submitted to a valid certificate authority have been filled out. The Domains field has been highlighted yellow in order to indicate that it is a required field.
-
Once you have filled out the fields, click the Create button (
) at the bottom of the page to generate the self-signed SSL certificate.
-
The next page will display the resulting self-signed SSL certificate based on your CSR. While cPanel automatically stores the SSL information that it generates (viewable in WHM » SSL/TLS » SSL Storage Manager), it is recommended to copy this information and save it to a local device for record keeping.
Conclusion
You are now done! The SSL certificate can be installed for a domain on the server itself, or used for a service outside of the cPanel server if needed.