Manually Add Accounts and Products to HostDime's Email Filter and Archive Services
This article will explain how to manually set up Sub-Administrators, Domains, Domain Users, and Email Users on HostDime's anti-spam service.
Table of Contents
- Create Sub-Administrative (Sub-Reseller) Accounts
- Add a Domain
- Add Products to a Domain
- Create a Domain User
- Create an Email User
- Explanation of User Levels in HostDime's Anti-Spam Control Panel
⚠️ Not every account will have all of these features.
Create Sub-Administrative (Sub-Reseller) Accounts
If you are an Administrator (reseller), you have the ability to create Sub-Administrator (sub-reseller) accounts. These accounts have the ability to add domains and users (as well as other sub-admins). If you don't see these settings, you are likely a Domain User.
Click here to expand or contract...
-
Log into https://login.antispamcloud.com/ as an Administrator (reseller). By default, this will take you to the dashboard.
-
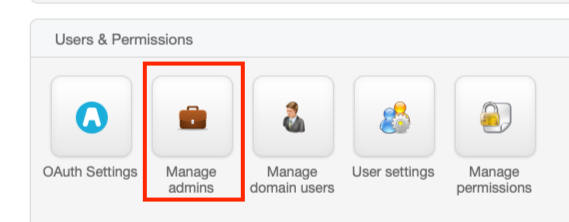
Scroll down in either the sidebar or the dashboard and find the Users & Permissions section and click on Manage admins.
-
This will take you to a screen listing all of the sub-admin accounts that have been created. Near the top-left of this section, click the Add button.
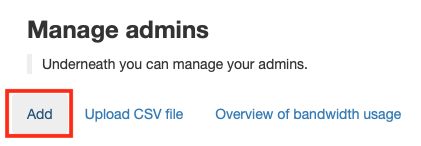
⚠️ If you have several Sub-Administrator accounts to set up, you could always create a CSV file using the format listed in the Upload CSV file feature.
-
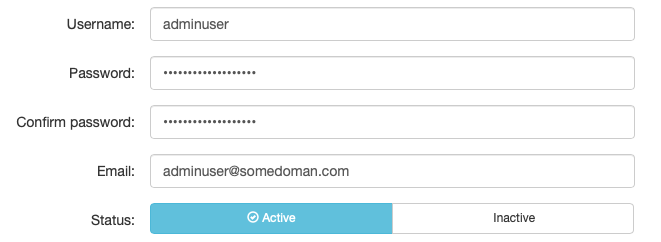
Now start filling in the basic information needed to create an account, including a username, password, email address (please make sure the email address is valid). You can also choose to activate the account immediately so the user can log in right away or make it inactive. If it is inactive, the account is created, but they cannot log into the account.
-
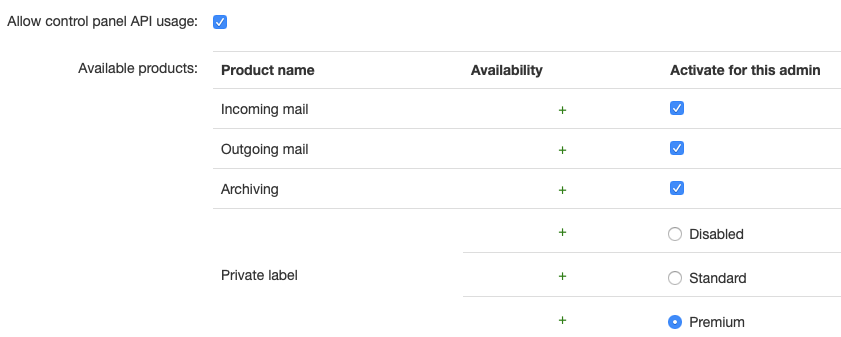
Next, you need to start setting any limitations you want to place on this Sub-Administrator.
⚠️ Permissions always cascade downward in our anti-spam control panel. That means if your administrative user doesn't have access to something, you won't be able to grant access to that thing to your Sub-Administrators. If you have access to a feature and deny access to that feature to your Sub-Administrator(s), none of the accounts they add will have access to that feature, but you'll still be able to use it in yours.
- Allow control panel API usage: API access is needed if the Sub-Administrator plans to use the WHMCS module or the cPanel or Plesk modules.
- Available products: You can also restrict access to the
various products we offer.
- Incoming: This is the most common product people use. It filters mail that is being sent to a Domain.
- Outgoing: This filters mail being sent from a Domain.
- Archiving: This enables inbound and outbound message archiving and continuity service.
- Private label: This controls whether the Sub-Administrator
can add custom branding for themselves and their clients if they
want.
- If private labeling is Disabled then this admin account (and any accounts or users below them) will see the same branding you see.
- If it is set to Standard, then this account and any below it will set the default blue white label branding that we provide.
- If you select **Premium **then this account will be able to access branding tools so they can create custom branding for themselves.
-
There are still a few limitations and other items you need to review before you finish creating the Sub-Administrator account.
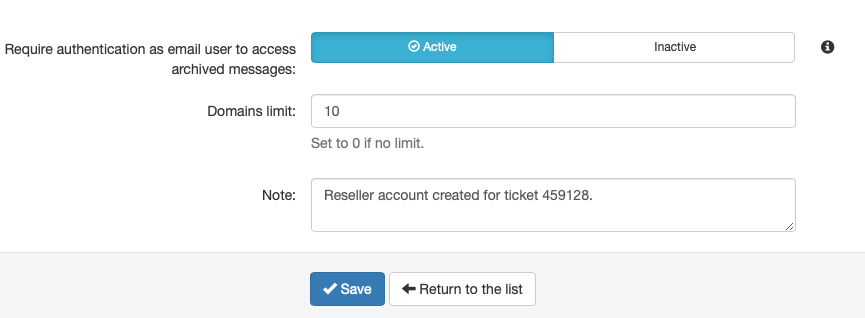
- Require authentication as email user to access archived messages: If this feature is activated for this Sub-Administrator account, this account and any Sub-Administrator accounts below them will not be able to view the full message body unless they authenticate as the Email User first. The Sub-Administrator can still view the logs and see basic information about messages, but they won't be able to read the entire message like they would normally be able to do.
- Domains limit: You can limit the total number of Domains the Sub-Administrator or their admins can add to this service (they cannot create more domains than your account is permitted).
- Note: This is optional, but highly recommended. Enter a note that makes it clear why this Sub-Administrator account is being set up.
-
Once you are happy with the settings, click the Save button to create the account. It is possible to edit all of these settings later.
⚠️ Creating an (Sub-)Administrator account does not email the user providing these details. It is up to you as the account creator to communicate all account access details to the appropriate person.
Add a Domain
Setting up products or other types of users requires adding a Domain to our anti-spam control panel first. This process does not activate any products for the domain. The domain should already be registered and have a valid mail server. Our service is not designed to serve as a domain's only mail server.
Click here to expand or contract...
- Log into https://login.antispamcloud.com/ as the Sub-Administrator (reseller). By default, this will take you to the dashboard.
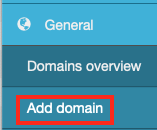
- In the sidebar on the left, click on Add domain under
the General section of the sidebar.
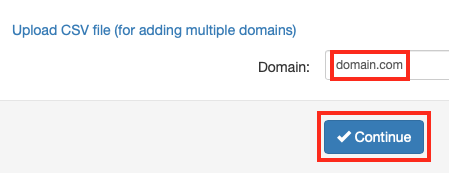
- Type the name of the domain you want to add to our service then
click the Continue button.
- We will look up the MX record(s) for that domain and if we find any,
it will be displayed now. If not, you will need to fill them in
manually.

- Destination name: This is the fully qualified domain name of the mail server that handle mail for this domain. It is possible to specify an IP address, but it's not recommended.
- The port that our service will use to try to deliver mail is listed after the colon. By default we select 25, but feel free to adjust this to the preferred SMTP port.
- You can add more mail destinations for this domain by clicking on the Add route button and then repeating steps A and B above.
- If you want to adjust the priority of these destinations, you can use the up or down arrows to the right of the record. Our service will try to deliver mail to the first destination first and then go down the list.
- If you want to remove a destination, click the X to the right of the destination record.
- When everything looks good, click Continue to set up the domain.
Add Products to a Domain
Once you've added a domain, you now need to assign one or more products to that domain.
Click here to expand or contract...
- Log into https://login.antispamcloud.com/ as the Sub-Administrator (reseller). By default, this will take you to the dashboard.
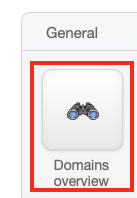
- Click on Domains overview in the sidebar or in the dashboard
under the General section.
- Find the domain(s) you are looking to add a product too. Use the Search field above the list if needed.
- If you are going to edit the products for a single domain, you can
click the down arrow next to the checkbox you'd normally click to
select multiple domains. Then choose Manage products from the
drop-down menu.
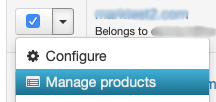
- If you want to edit several domains. Check the box next to each domain to edit and then at the bottom of the list, choose Manage product and click Apply.
- Check boxes next to each one of the products you want to activate
for this domain (or multiple domains). Uncheck any products you no
longer want the domain(s) to have.
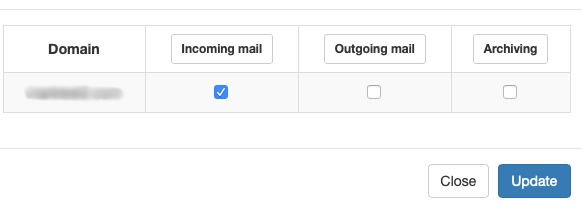
- Click Update to apply your changes.
- The products you selected may take up to 15 minutes to start/stop routing mail if the domain is already properly configured.
Create a Domain User
After you've added a domain to our service, you will probably want to create a Domain User so that the client in charge of that domain can manage the settings related to it. Creating a Domain User isn't required, but without one, only the (Sub-)Administrator can manage the Domain-level settings.
Click here to expand or contract...
⚠️ You can only create Domain Users for Domains that your (Sub-)Administrator account added. If you need to add a Domain User for another administrative account, you will need to log in as that (Sub-)Administrator. This does not require logging out of your current account so long as the account in question is a Sub-Administrator of your Administrator account.
-
Log into https://login.antispamcloud.com/ as the (Sub-)Administrator. By default, this will take you to the dashboard.
-
Scroll down the sidebar or dashboard and select Manage domain users from the Users & Permissions section.
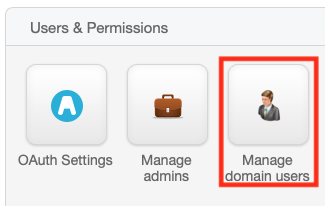
-
Click Add near the top of the Domain Users list to start creating a new Domain User.
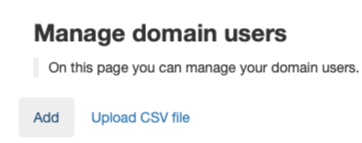
⚠️ If you need to create several Domain Users, you can click **Upload CSV file **and create a CSV file with the information listed in the order they tell you on that screen.
-
Fill in the information required to create the account.
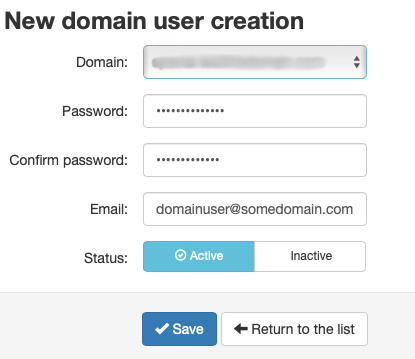
- Select an existing domain from the drop-down list.
- Enter a password (twice) for this account.
- Type in the email address to be associated with this account (it will be their username).
- By default all new Domain Users are Active, but you can select Inactive if you want to create the account but not let the user log in yet.
-
When you are sure everything is correct, click the Save button.
⚠️ Our service will not email the Domain User you just created. It will be up to you to provide them their login information.
Create an Email User
Email User accounts are designed to allow a Domain User to give a login to an end user so they can review the quarantine logs and other features for only their specific email account.
Click here to expand or contract...
- Log into https://login.antispamcloud.com/ as the (Sub-)Administrator or Domain User account for that domain. By default, this will take you to the dashboard.
- Skip to step 3 if you are logging in as the Domain User.
- Click on Domains overview in the sidebar or in the dashboard
under the General section.

- Find the domain(s) you are looking to add a product too. Use the Search field above the list if needed.
- Click on the actual domain name (which appears like a link in the list of domains).
- This will take you to the Domain User-level dashboard.
- Click on Domains overview in the sidebar or in the dashboard
under the General section.
- On the Domain User's dashboard, scroll down the sidebar or dashboard
to click on the Manage email users button.
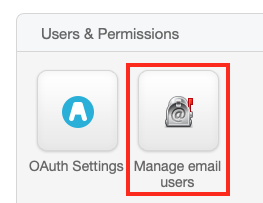
- Click the Add button.
- Fill out the Email User's account information.
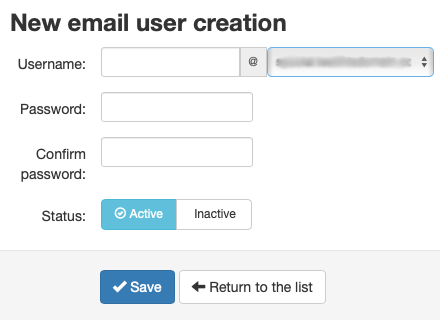
- Although the username can match the email address itself, it doesn't have to.
- Even if you do use the email address as the username, we do not recommend you use the same password as the email account. Reusing passwords is not safe.
- Click Save to create the Email User account.
Explanation of User Levels in HostDime's Anti-Spam Control Panel
Our anti-spam control panel allows for a number of different user types and unfortunately, it isn't possible to accomplish every task as an Administrator. To get to some functions, you need to descend into different user levels and sometimes into specific accounts. Sometimes our control panel will descend automatically to the appropriate user level when you select an item, but most of the time, you need to understand how the levels work and manually switch to the right context.
Descend to Domain User Level Automatically
If you are a (Sub-)Administrator some of the features listed in the
control panel only work when you are on the Domain User's level. The
control panel will automatically switch to that level when you click on
a feature that requires it. You can tell you are on the Domain User
level by checking the area near the logout button on the top-right of
the screen:

If you are done working on the Domain User level and need to return to the Administrator level so you can complete other tasks, click the **Return to Overview **button that appears before the language selector.
Descend to Sub-Administrator, Domain User or Email User Level
There are some tasks you may want to accomplish as a Sub-Administrator, Domain User or Email User and for those you need to manually select the option to log in as that user. You don't need the password for the account to accomplish this task. To do this, follow these steps:
Click here to expand or contract...
- Select **Mange administrators **or Manage domain users as appropriate. You must be at the Domain User level to log in at the Email User level.
- Find the user you want to log in as.
- Next to the checkbox that you'd select if you wanted to select several accounts, there is a down arrow. Click it and select Login as user.
- You will be taken to the dashboard for that user and the logged in username will be displayed at the top-left of the screen.
- If you want to log in as a specific Email User, do that now by selecting Manage email users and following steps 2-4.
Return to Your Normal Account Level or Log Out Completely
To return to your administrative account level no matter how far down you have descended, click on the black logout button on the top-right of the screen and confirm your choice.
You will see that the logged in username has changed on the top-right and you are once again on your normal level.
If you click the black logout button again and confirm, you will be completely logged out of our control panel.
User Level Definitions
Administrator: If you are a reseller of our services, then this is the type of account you will have in our anti-spam control panel. An Administrator can create Sub-Administrator (sub-reseller) accounts, or assign domains and products directly to themselves.
ℹ️ Please note that as a reseller, all of the resold accounts you create must have services hosted in HostDime's data centers.
Sub-Administrator: These are administration accounts that Administrators make. If you are a reseller of our service, you can have other resellers. They can be restricted in the same way Administrators can, but if there are limits placed on the Administrator account, then Sub-Administrator accounts cannot access features or use more domains than the Administrator account itself (but the sub-admin can be restricted further). It is possible to create many levels of sub-admin accounts. Sub-Administrators can only see the domains and users they create.
Domain User: This is the type of account most of our clients will have. Domain User accounts are accounts tied to a specific domain or domains and they can access the logs and specific features assigned to that specific domain or domains. Domain Users can create Email User accounts for their specific domain(s).
Email User: An Email User can only see the logs and settings that apply to a specific email account in a domain. This allows the end user of a specific email account to blacklist or whitelist email and view the filter logs for only that email account.
Product Definitions
Domain: Before you can activate a specific product, you need to set up the domain name and the proper mail server and mail port to use when trying to deliver clean mail. It is possible to set up a domain without assigning any products to it. Only (Sub-)Administrator accounts can add domains.
Inbound: This product filters incoming mail getting delivered to a Domain. This also includes Backup MX for free. This is the most popular product. It covers every email account in a domain.
Outbound: This product filters mail users send from a Domain. This helps to stop spammers from exploiting compromised email accounts. This protects all mail accounts in a domain.
Archiving: Archiving saves copies of incoming and outgoing messages sent to or from a domain for over 10 years so long as there is enough space to store the mail. This product also includes continuity features. If the domain's main mail server goes down for an extended time, the user can log into our service and read and respond to mail there until the normal mail service is restored. One license includes 10 GB of compressed mail storage. If you need more storage, contact us to buy a second Archiving license for the same domain.
Backup MX: This is included with Inbound filtering. Backup MX service holds on to all incoming mail automatically if it is unable to reach the destination mail server. Our servers will periodically attempt to reconnect with the mail destination and once it is responding normally, they will attempt to deliver all of the mail that came in while the mail server was offline. The Backup MX service can retain mail for up to 14 days.